Bodinayakkanur
Historical background
Bodinayakkanur, picturesquely sited at the foot hills of Western Ghats in the Theni district, of Tamil Nadu, is a thriving market town where cardamom, coffee, tea, pepper, and silk-cotton are traded.
The zamindars of Bodinayakkanur Palayapattu, whose history goes back to the 14th century, claim to be the descendants of the mythical Kalaikottu Munivar, i.e. Rishyashringa maharishi. They belong to the Rajakambalam Nayakas, a Telugu speaking group who fled from the Bellary region, in present-day Karnataka State, when, in the early 14th century, the troops of Alauddin Khilji invaded that region. They migrated first to western Tami Nadu, then proceeded southwards and eventually settled in the area of Bodinayakkanur.
Read more
In the heart of the town is the palace of the Zamindar of Bodinayakkanur Palayapattu Zamin, built by Bangaru Tirumalai Bodi Nayaka (r. 1849 – 1862). The sprawling building, unfortunately in a sad state of disrepair, houses a generous-sized Darbar hall, the Lakshmi Vilasam, a large room used in bygone days as treasury, a gymnasium, a visitors’ hall, stables for horses and elephants, and a granary. At the death of Bangaru Tirumalai Bodi Nayaka in 1862, his heir Tirumalai Bodaiya Kamaraja Pandya Nayaka was a minor, so the British first took over the administration of the state and, in due course, its territory.
An extensive set of Ramayana paintings, dating of the mid-19th century, adorns the walls of the Lakshmi Vilasam and the Darbar hall. Above each scene is an explanatory caption in colloquial Tamil. The Balakanda narrative, from the beginning up to the departure of the four princely couples from Mithila is ingeniously laid out on the walls of the Lakshmi Vilasam. Particularly interesting are the scenes dealing with the nuptial rituals and the ceremonies, performed according to the Rajakambalam Nayakas traditions. A small shrine in this room houses a painting of the eight-armed family deity of the ruling family, Vadamalai Nachiammannai.
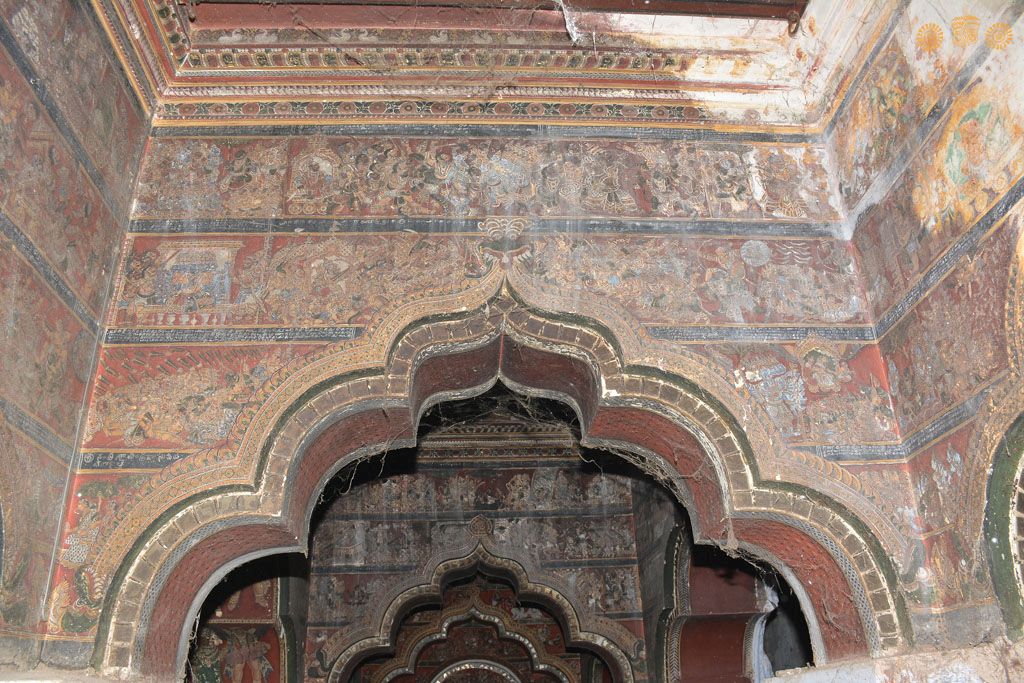
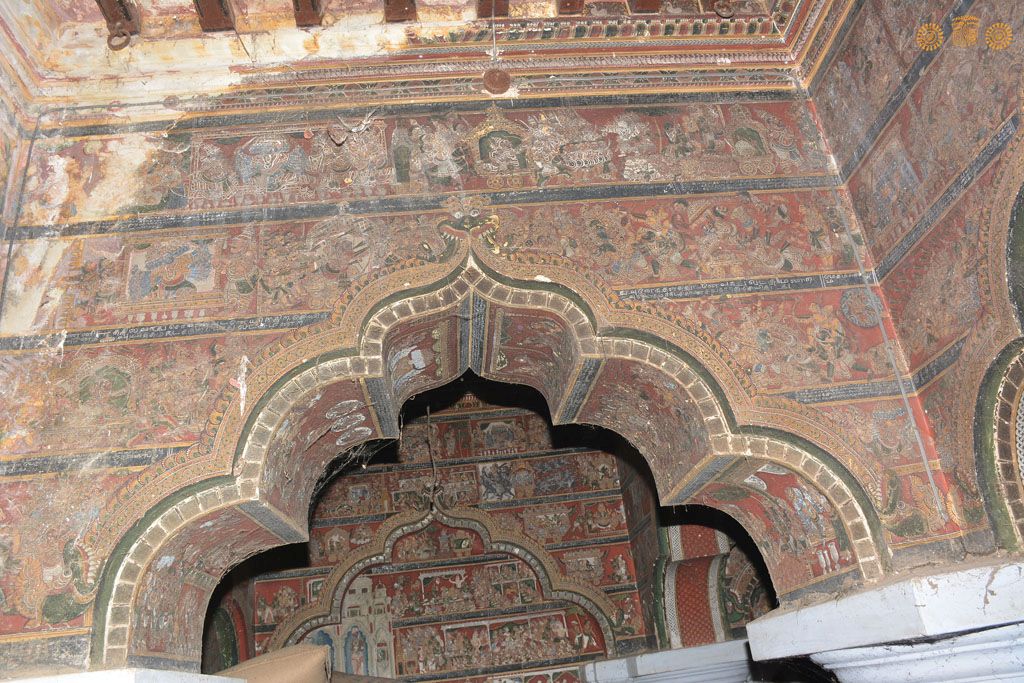
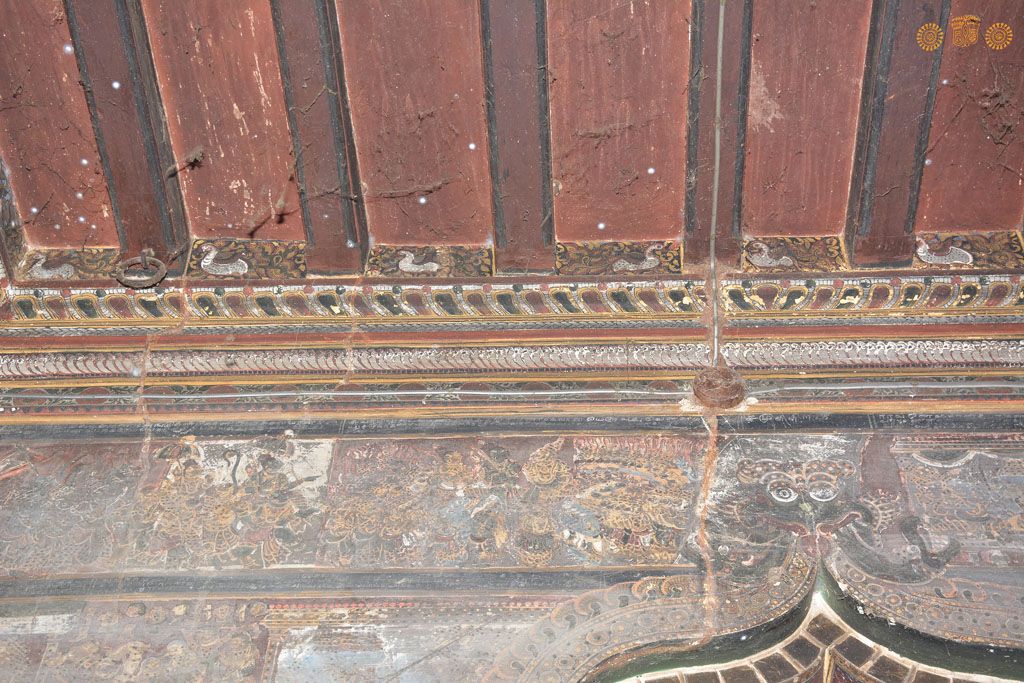
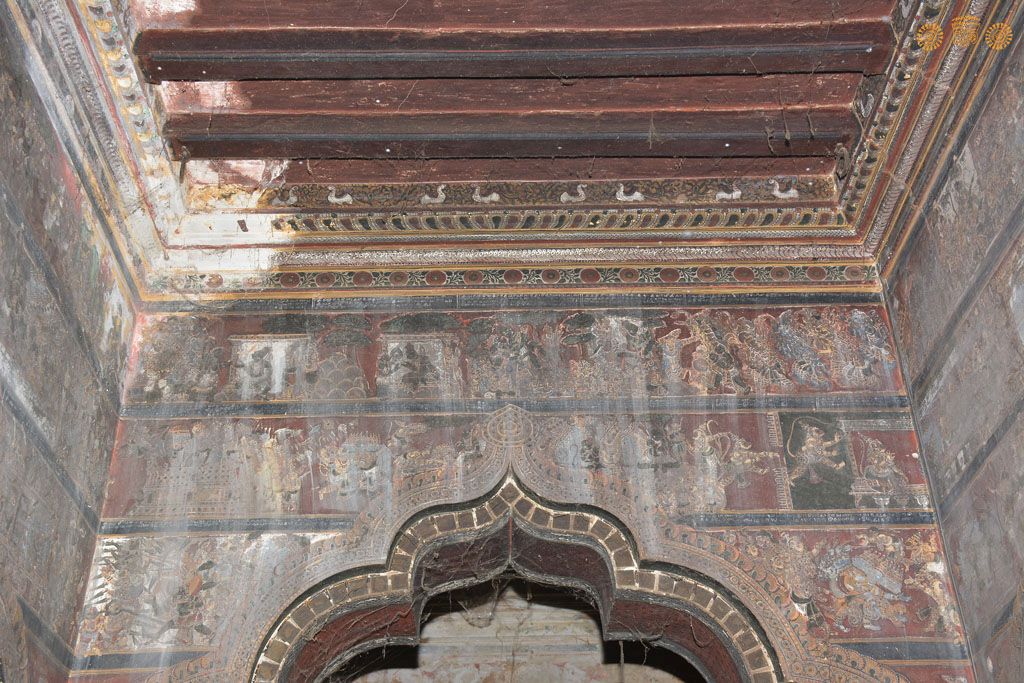
The rest of the narrative is illustrated in great detail on the walls of the Darbar Hall. The rendering of the Parashurama episode followed by the arrival of the newly wed couples in Ayodhya is, strangely enough, the sole episode painted on a portion of the Darbar Hall’s ceiling. Episodes from the Yuddhakanda, such as Indrajit’s sacrifice in Nikumbhila, as well as scenes of music and dance are found on the underside of the lobed arches supporting the hall’s ceiling. Sadly a section of the murals depicting the Yuddhakanda, is lost.
Date: mid-19th century
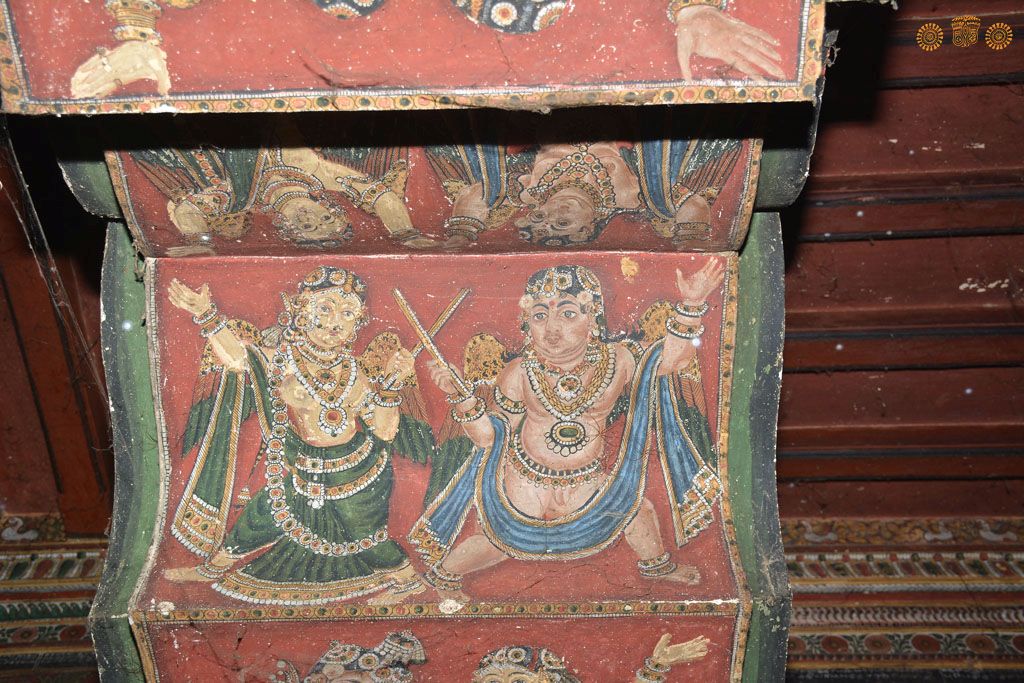
Description: Scene on the underside of the lobed arches: A gandharva and a gandharvi performing the stick dance.
Location: Tamil Nadu Palace;Bodinayakkanur
Positioning: Darbar Hall
Date: mid-19th century
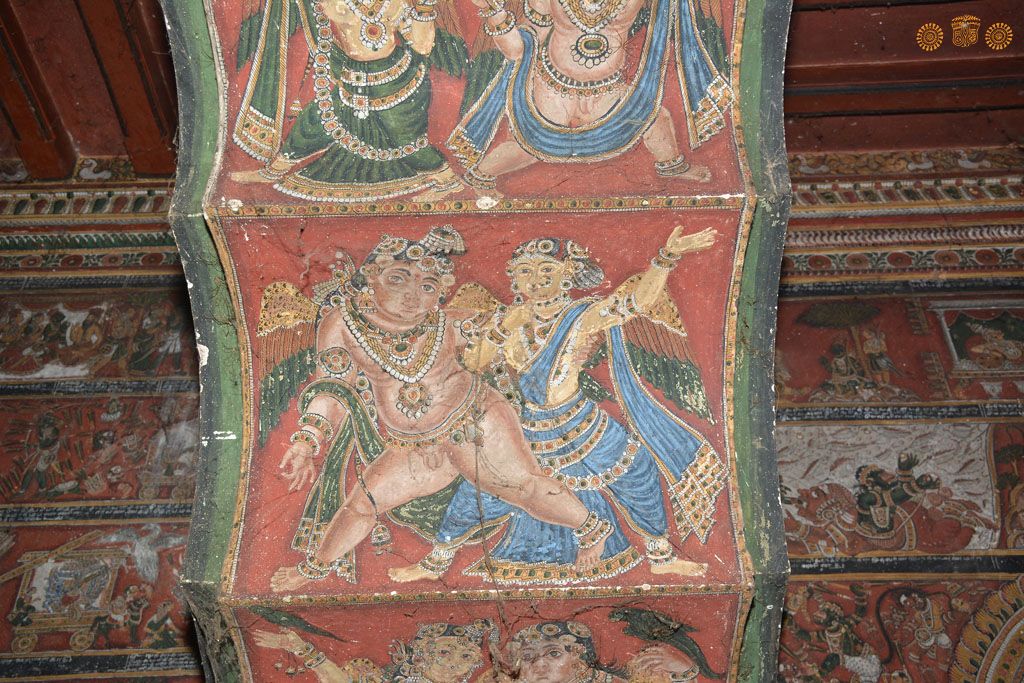
Description: Scene on the underside of the lobed arches: A gandharva and a gandharvi dancing.
Location: Tamil Nadu Palace;Bodinayakkanur
Positioning: Darbar Hall

Date: mid-19th century
Description: Scene on the underside of the lobed arches: A gandharva and a gandharvi dancing.
Location: Tamil Nadu Palace;Bodinayakkanur
Positioning: Darbar Hall

Date: mid-19th century
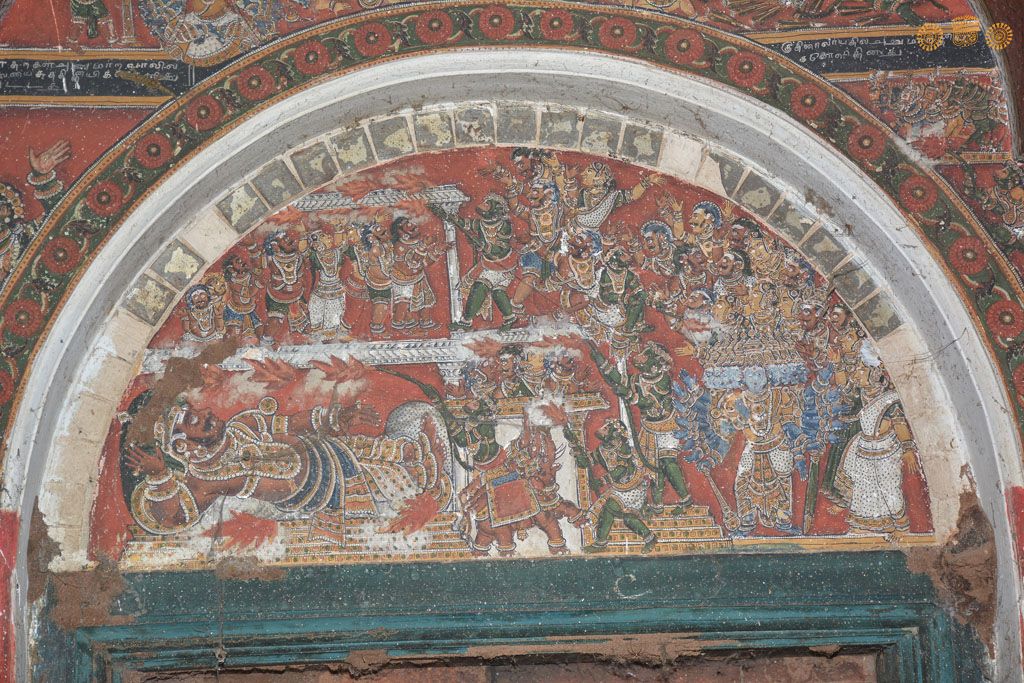
Description: Above the arch: Ravana sends Indrajit to capture Hanuman; In the arch: The burning of Lanka; On the left of the arch: Hanuman’s tail is wound in oiled rags; On the right of the arch; Hanuman takes leave of Sita.
Above the door: the burning of Lanka; on the left Hanuman’s tail is wound in oiled rags; Above the door; Under the gaze of Ravana, his wife and courtiers, Hanuman sets Lanka ablaze; On the right, he takes leave of Sita.
Location: Tamil Nadu Palace;Bodinayakkanur
Positioning: Darbar Hall
Date: mid-19th century
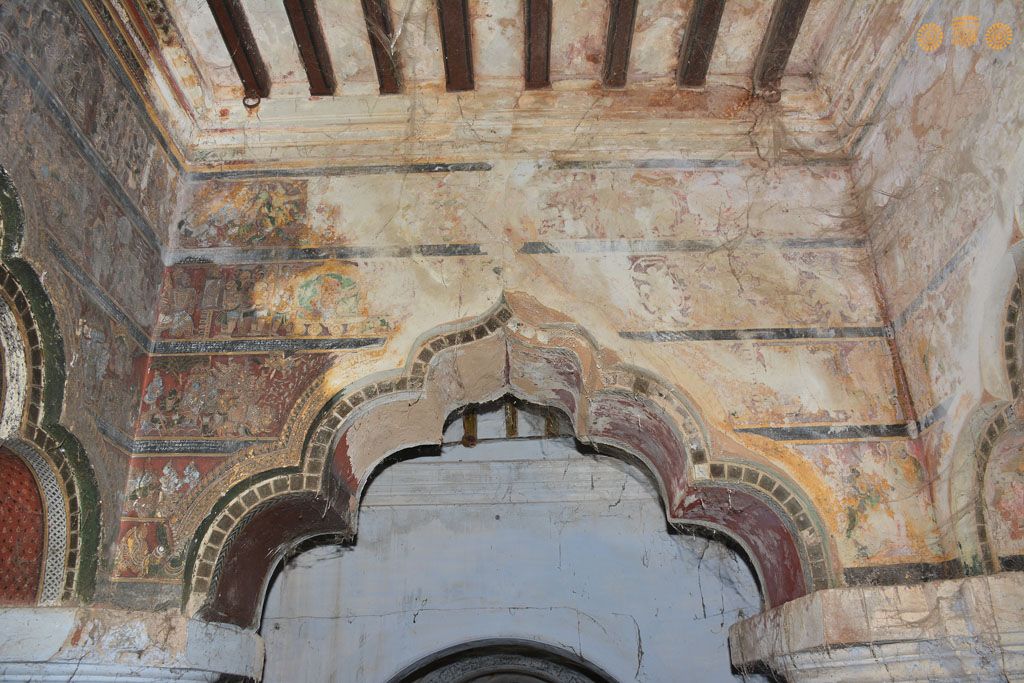
Description: In the arch: Under the gaze of Ravana, his wife and courtiers, Hanuman sets Lanka ablaze. On the left: Kumbhakarna asleep while Lanka is burning.
Location: Tamil Nadu Palace;Bodinayakkanur
Positioning: Darbar Hall

Date: mid-19th century
Description: The paintings of this part of the hall have disappeared.
Location: Tamil Nadu Palace;Bodinayakkanur
Positioning: Darbar hall
Date: mid-19th century
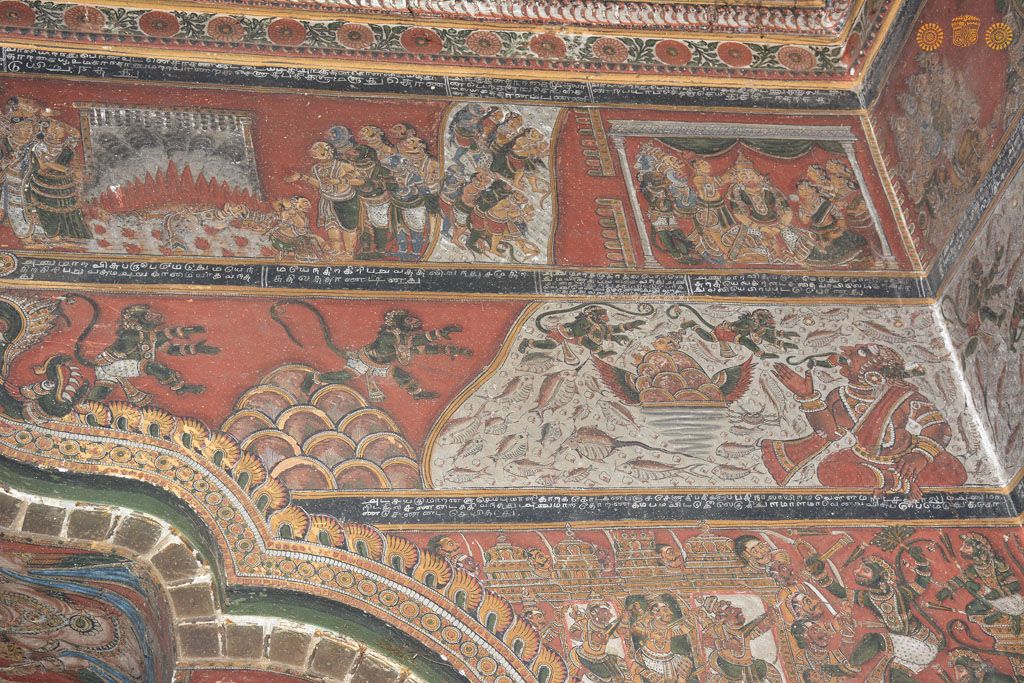
Description: Top row: A battle scene (?); Second row: Indrajit (?) looking at himself in a mirror (?); Third row: Indrajit binds the allies’ troops with the nagapasha (snake noose) but they are rescued by Garuda; Fourth row: Wounded heroes (?).
Location: Tamil Nadu Palace;Bodinayakkanur
Positioning: Darbar Hall
Date: mid-19th century
Description: Top row: Rama in council; Kumbhakarna enters the fray; Second row: Ravana sends Indrajit to the battlefield; He uses the magical nagapasha (snake noose); Third row: The allies’ army is rendered unconscious; Ravana looks on the battlefield strewn with corpses; Trijata takes Sita on an aerial chariot and shows her the wounded heroes on the battlefield; Fourth row: Ravana (on the adjacent wall, left) visits Sita in the ashoka grove.
Location: Tamil Nadu Palace;Bodinayakkanur
Positioning: Darbar Hall
Date: mid-19th century
Description: Top row: Ravana in council; Kumbhakarna fights against the allies’ army; Kumbhakarna (?) is greeted by his companions; Second row: Ravana and
Kumbhakarna; After a fierce battle, Kumbhakarna is killed by Lakshmana; Third row: Lakshmana fights against Indrajit; Indrajit concealed in a cloud lets loose a rain of arrows on the allies’ army; Fourth row: Rama and his allies; Ravana and his troopers.
Location: Tamil Nadu Palace;Bodinayakkanur
Positioning: Darbar Hall
Date: mid-19th century
Description: Top row: Rama and his troops.
Location: Tamil Nadu Palace;Bodinayakkanur
Positioning: Darbar Hall

Date: mid-19th century
Description: Top row: Rama in council; Consecration scene (?Vibhishana joins Rama’s party); Rama in council; Rama sleeps on a bed of darbha grass on the shore of the sea; Sagara prostrates before Rama; Council scene; Second row: (illegible), Council scene; Ravana in Lanka; Battle scene; Third row: Rama in council; Hanuman carries Rama on his shoulder, Angada (?) carries Lakshmana.
Location: Tamil Nadu Palace;Bodinayakkanur
Positioning: Darbar Hall

Date: mid-19th century
Description: Top row: Rama in council; Consecration scene (?Vibhishana joins Rama’s party); Rama in council; Rama sleeps on a bed of darbha grass on the shore of the sea; Sagara prostrates before Rama; Council scene; Second row: (illegible), Council scene; Ravana in Lanka; Battle scene; Third row: Rama in council; Hanuman carries Rama on his shoulder, Angada(?) carries Lakshmana.
Location: Tamil Nadu Palace;Bodinayakkanur
Positioning: Darbar Hall

Date: mid-19th century
Description: Top row: Hanuman flies above the sea returning from his expedition to Lanka; The vanaras destroy the Madhuvana; Hanuman meets Rama; Second row: the vanaras build the bridge and cross the strait and reach Lanka; Rama in council; Third row: Ravana in council; Ravana on a chariot rides into the battlefield.
Location: Tamil Nadu Palace;Bodinayakkanur
Positioning: Darbar Hall
Date: mid-19th century
Description: Top row: Hanuman hands to Rama Sita’s chudamani (head-jewel); Rama and Lakshmana talk to Hanuman and Jambavan and review the assembled troops; Second row: Ravana is on top of a tower, Sugriva(?) jumps on him, grabs his crown and brings it to Rama; Rama sends Angada on a diplomatic mission to Lanka; Third row: battle scene, Lakshmana on Hanuman’s shoulder routs the rakshasas; Ravana on the battlefield wounds Lakshmana.
Location: Tamil Nadu Palace;Bodinayakkanur
Positioning: Darbar Hall
Date: mid-19th century
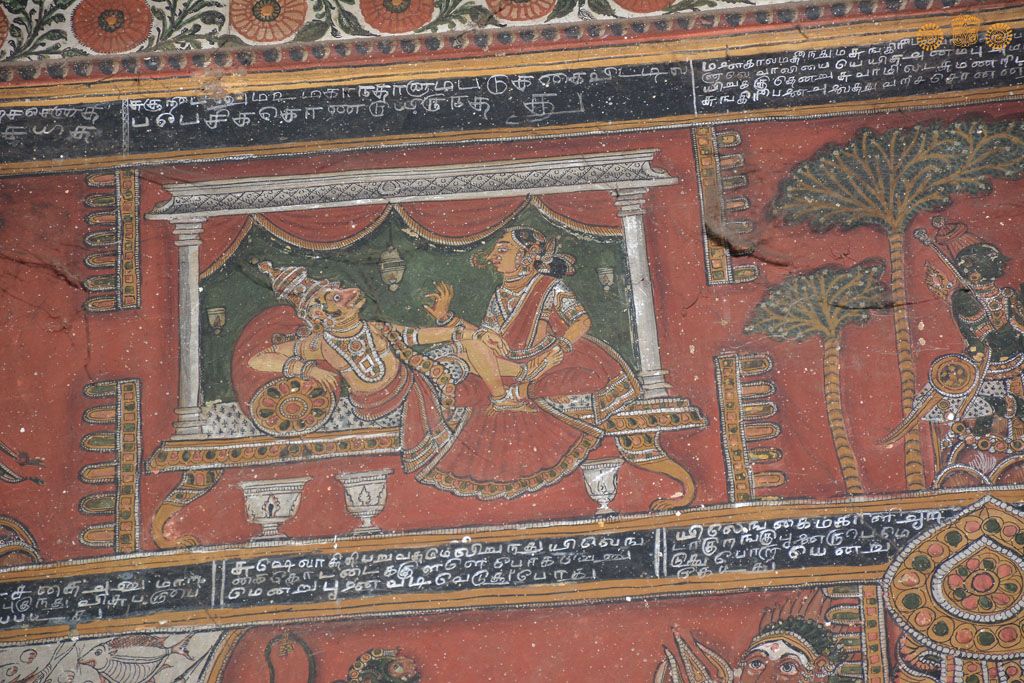
Description: Tara and Sugriva in Kishkindha.
Location: Tamil Nadu Palace;Bodinayakkanur
Positioning: Darbar Hall
Date: mid-19th century
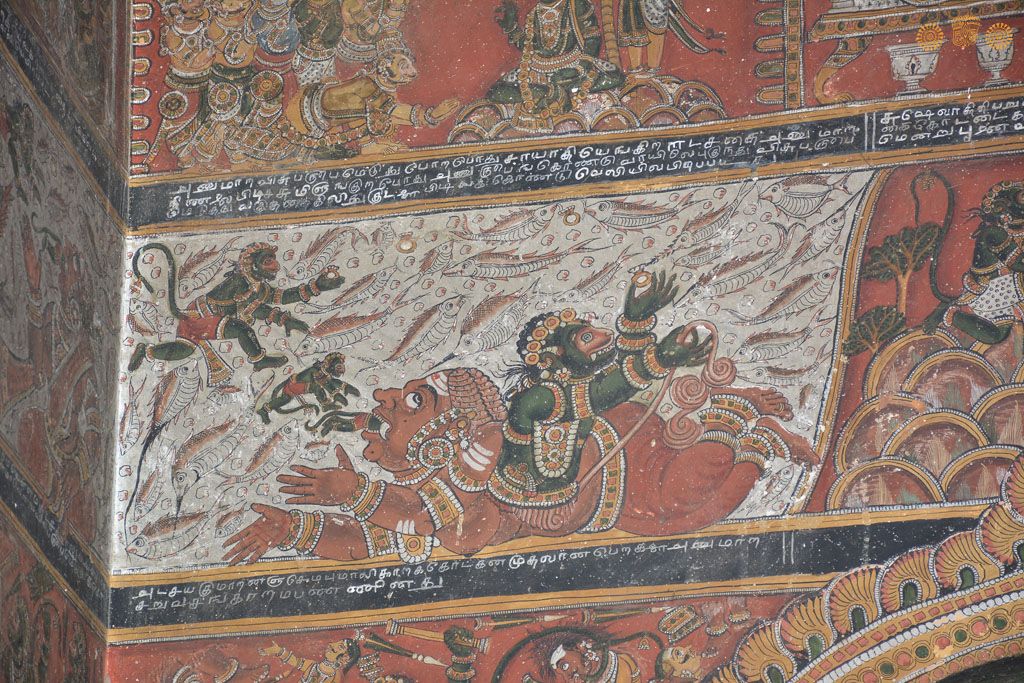
Description: On his flight to Lanka Hanuman encounters the rakshasi Simhika; She swallows his shadow and he kills her and escapes.
Location: Tamil Nadu Palace;Bodinayakkanur
Positioning: Darbar Hall
Date: mid-19th century
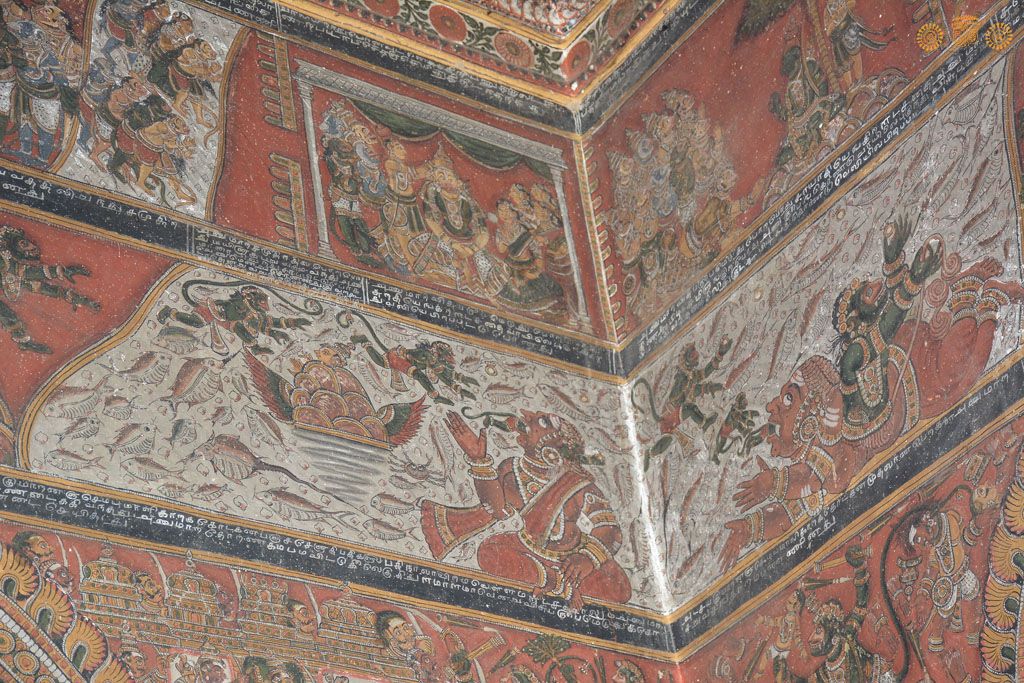
Description: From left: On his flight to Lanka Hanuman rests on Mount Mainaka; He then encounters the rakshasi Surasa, who swallows him, but he escapes from her ear; Then the rakshasi Simhika swallows his shadow, but he kills her and escapes.
Location: TamilNadu Palace;Bodinayakkanur
Positioning: Darbar Hall
Date: mid-19th century
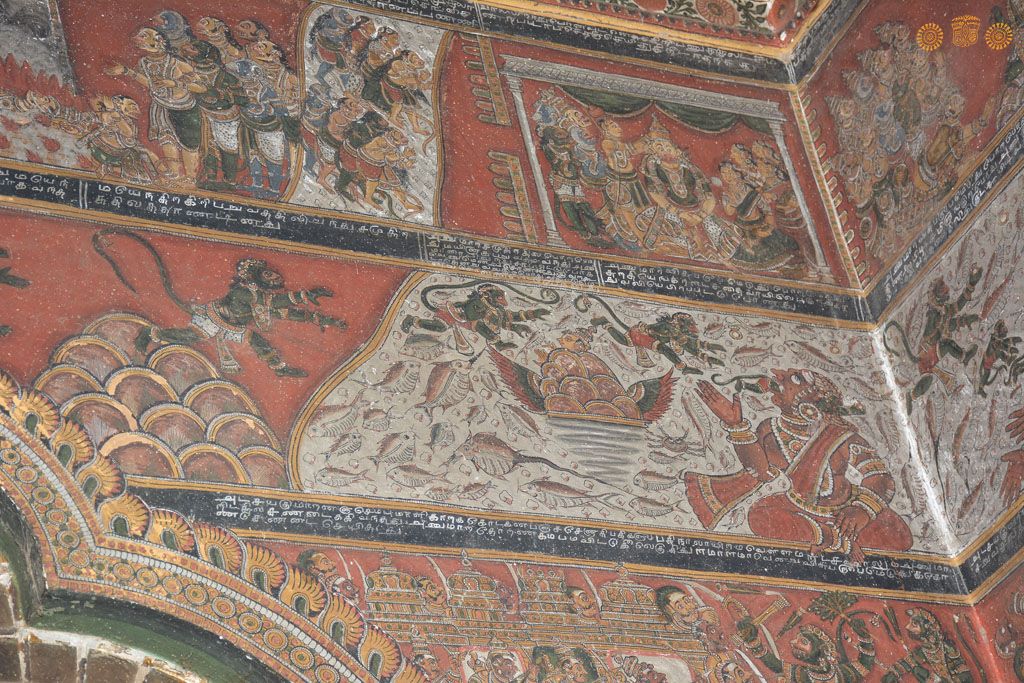
Description: Hanuman jumps across the ocean from Mount Mahendra. He rests on Mount Mainaka and then he encounters the rakshasi Surasa who swallows him, he, however, escapes from her ear.
Location: Tamil Nadu Palace;Bodinayakkanur
Positioning: Darbar Hall
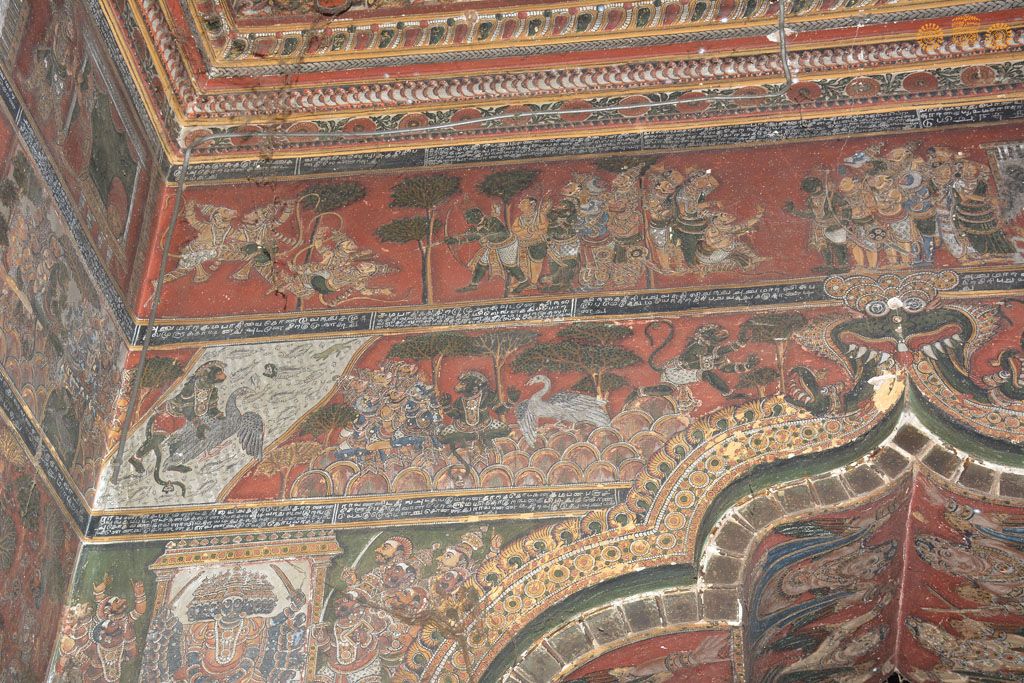
Description: Top row: Vali’s cremation; Angada collects the ashes; The participants in Vali’s last rites perform their ablutions; Lakshmana crowns Sugriva king of Kishkindha at the presence of his courtiers; Second row: Hanuman jumps across the ocean from Mount Mahendra, rests on Mount Mainaka, and then confronts the rakshasi Surasa who swallows him; Hanuman, however, escapes through her ear. Third row: Hanuman wrecks Ravana’s garden and fights against the rakshasas.
Location: Tamil Nadu Palace;Bodinayakkanur
Positioning: Darbar Hall
Date: mid-19th century
Description: Top row: The duel between Vali and Sugriva; Rama shoots Vali; Vali speaks to him; Second
row: Hanuman helps the king of the vultures Sampati to cross a river; Sampati tells him and his companions where Sita is held captive; Hanuman starts on his expedition to Lanka from Mount Mahendra; Third row: Ravana in council.
Location: Tamil Nadu Palace;Bodinayakkanur
Positioning: Darbar Hall
« Previous 1 … 7 8 9 10 11 Next »