Alagar Koyil, Kallalagar Temple
Historical background
Situated in the picturesque and densely wooded Alagar Hills, some twenty km to the north-east of Madurai, this temple is dedicated to a form of Vishnu known as Kallalagar (i.e. ‘Beautiful Lord of the Kallars’). Kallalagar is believed to be the brother of the tutelary goddess of Madurai, Minakshi (‘The Fish-eyed One’). He plays an important role in the marriage festival of Minakshi and Sundareshvara (i.e.‘Beautiful Bridegroom’) –a form of Shiva – that takes place at Madurai in April-May every year. This temple, one of the 108 Vaishnava sacred sites, is probably a 12th cent. Pandya foundation but was substantially enlarged and refurbished under Tirumala Nayaka of Madurai (r.1623-1659).
Read more
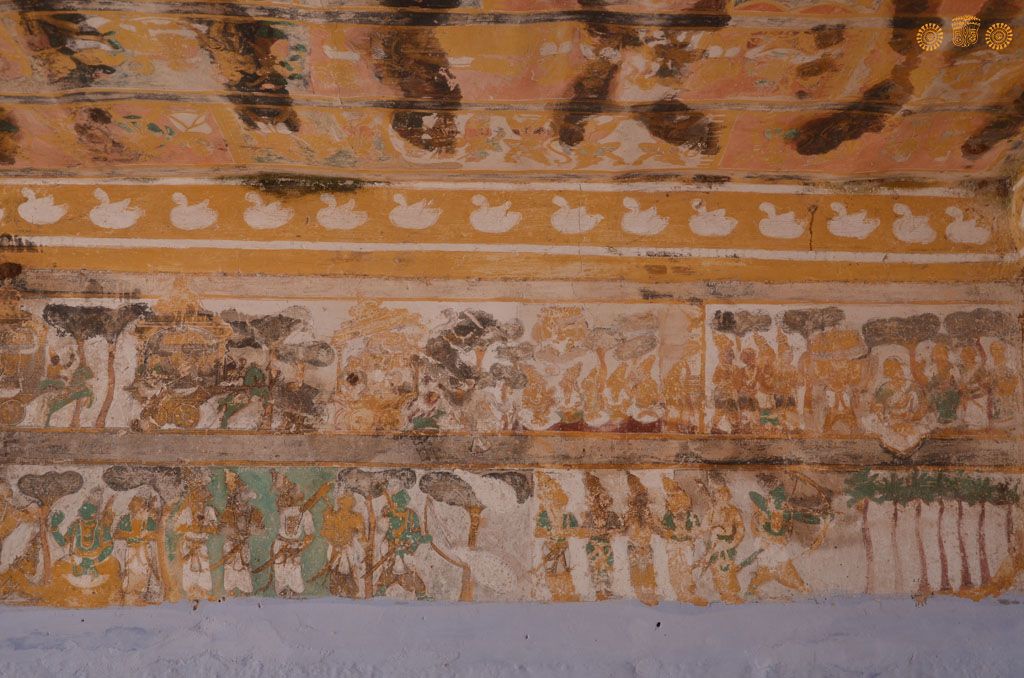
In the southwest corner of the outer courtyard of the temple, is the Vasanta mandapa (Spring mandapa) in which are 18th cent. murals illustrating the Ramayana. The building is open during the ten-days of the Vasantotsava (Spring festival) in the month of Vaikasi (May-June). For the rest of the year the mandapa is used as a store and kept locked. In its interior is a square island surrounded by a deep trench on which is a central pavilion whose roof is supported by four columns. Two further rows of columns skirt the island and the wall of the building. The central pavilion is accessible through small bridges on the east and the west. During the Vasantotsava the metal images of the deity and his consorts are taken each evening for three hours to this mandapa, the trench surrounding the central pavilion is filled with water and the whole structure decorated with flowers.
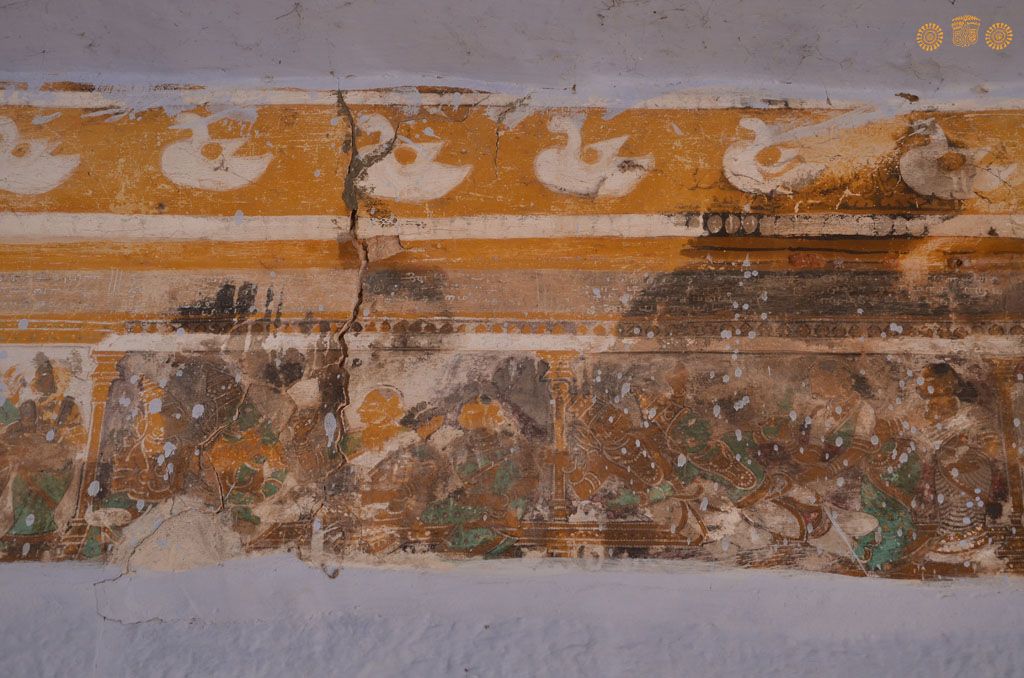
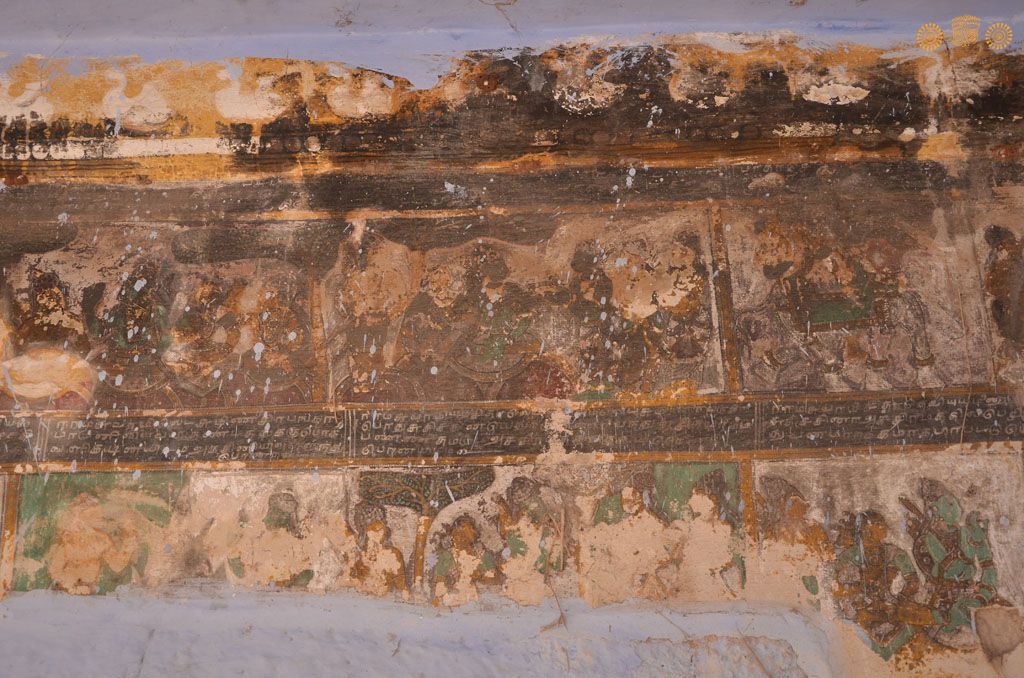
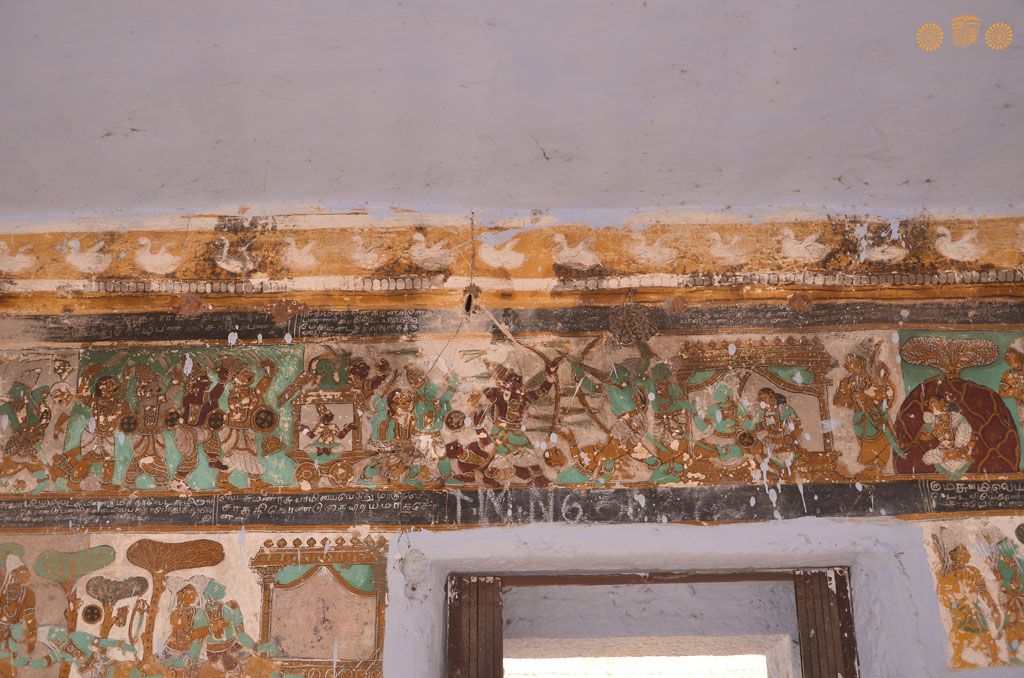
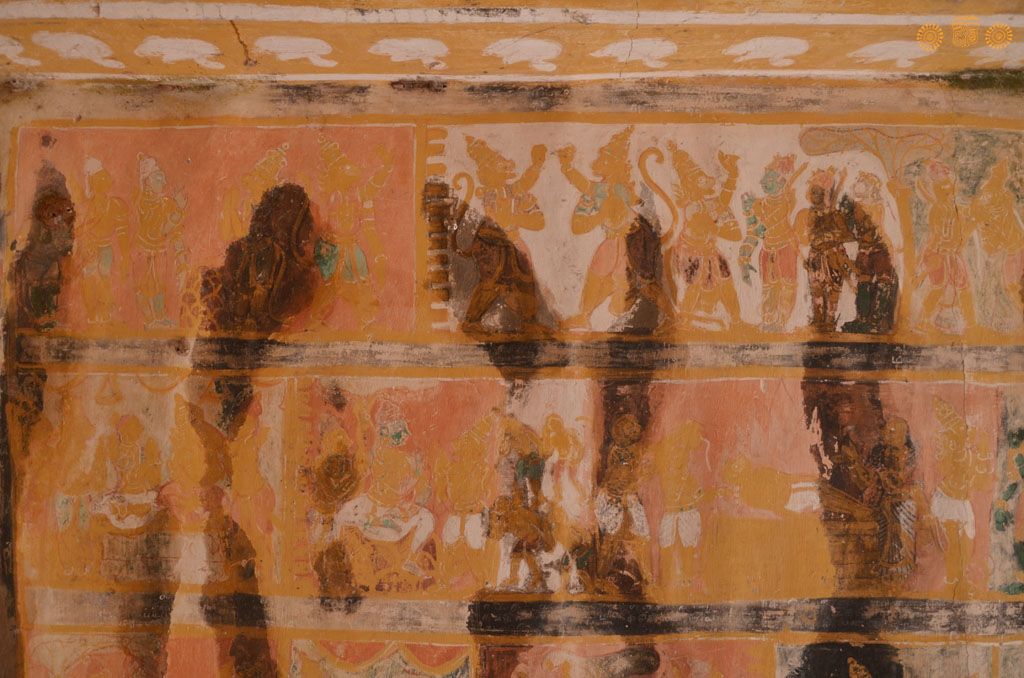
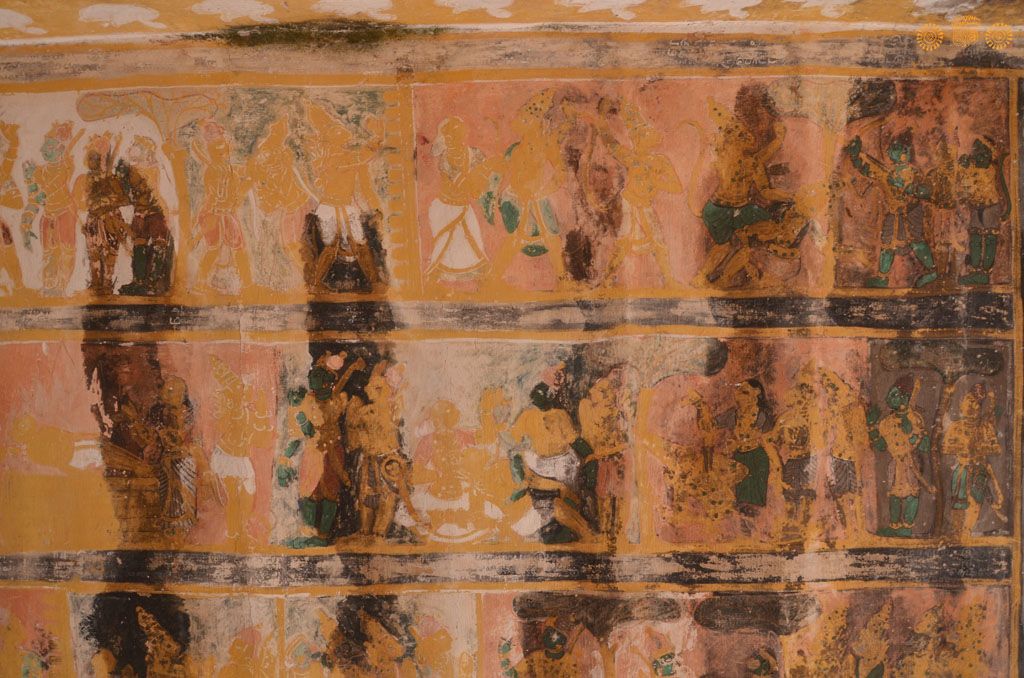
The paintings are laid out on the ceiling of the central pavilion, of the east corridor and on the upper parts of the walls. The scenes are arranged in narrow strips, with Tamil labels written on black background. There has been a progressive decay in the state of the murals since my first visit there in 1988-89. Water infiltrations have damaged a substantial part of the ceiling of both the central pavilion and east corridor, and spatter of whitewash have defaced some of the scenes on the walls. The paintings adorning the ceiling of the central pavilion depict the events narrated in the Balakanda, beginning with the sacrifice of Dasharatha and the birth of Rama and his three brothers, to the exploits of the youthful Rama culminating in the breaking of Shiva’s bow. The large panel in the middle shows Kallalagar with consorts and attendant deities, as seen in the sanctum of the temple. The rest of the narrative, some sections of which have disappeared, is laid out on the walls of the mandapa and on the ceiling of the east corridor where it ends abruptly with the meeting of Ravana and Kumbhakarna.

Date: 18th century, partly obliterated by whitewash
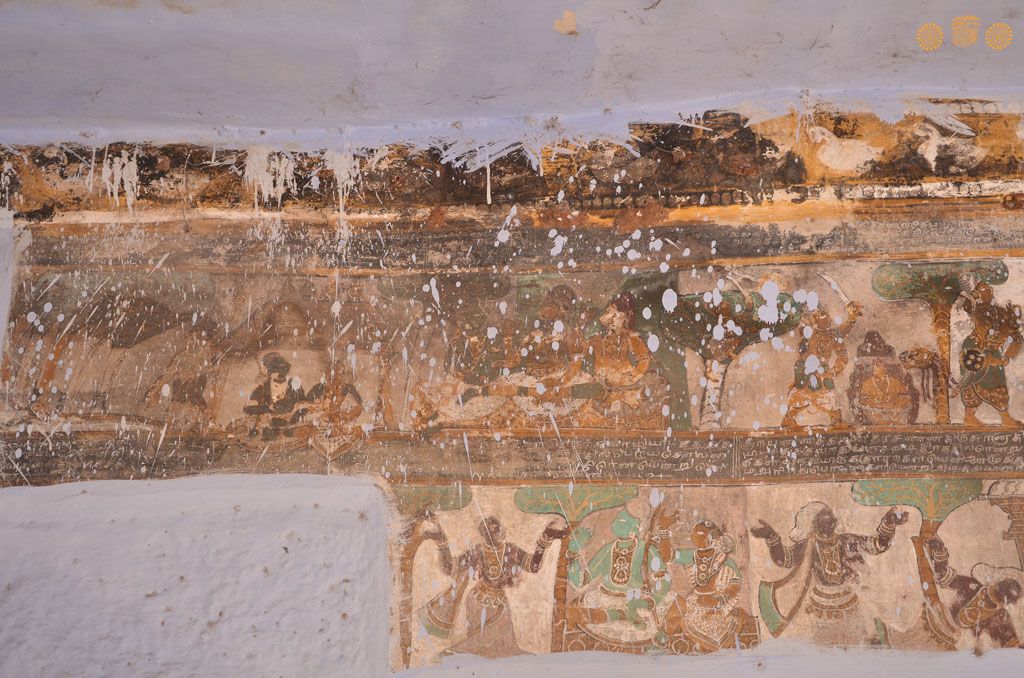
Description: Bharata is on the verge of retaliating, but Shatrughna restrains him; The two princes meet Kausalya and Sumitra.
Location: Tamil Nadu Temple;Kallagar Temple complex;Alagar Koyil
Positioning: Vasanta mandapa, west wall
Date: 18th century, partly obliterated by whitewash
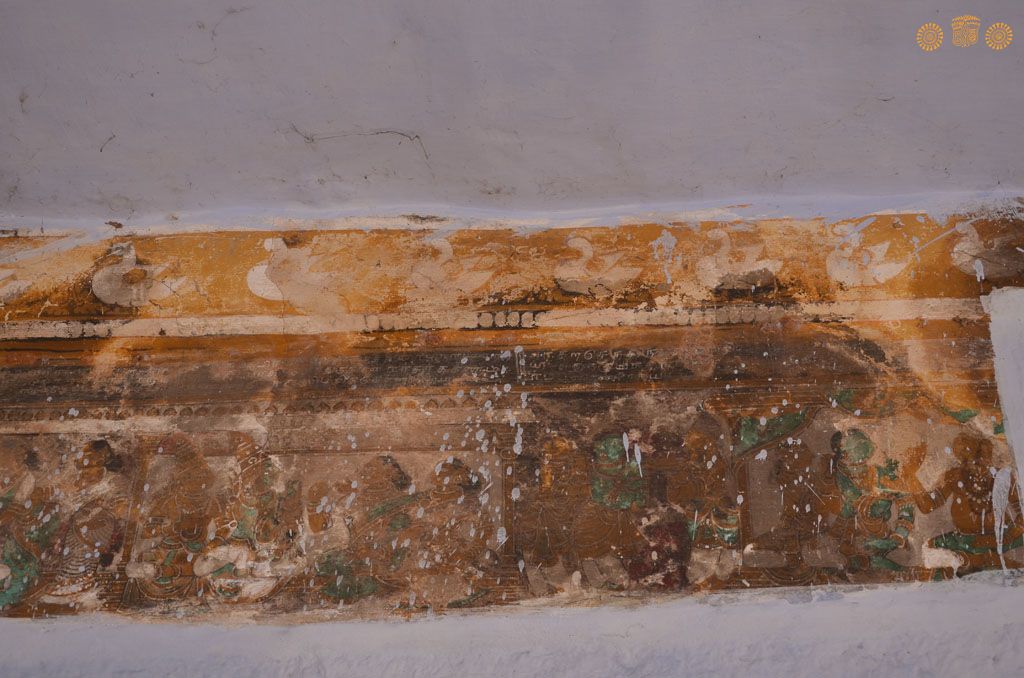
Description: Bharata and Shatrughna converse with Kausalya and Sumitra; Overcome by grief, the youths collapse and are consoled by the queens.
Location: Tamil Nadu Temple;Kallalagar Temple complex;Alagar Koyil
Positioning: Vasanta mandapa, west wall
Date: 18th century, partly obliterated by whitewash
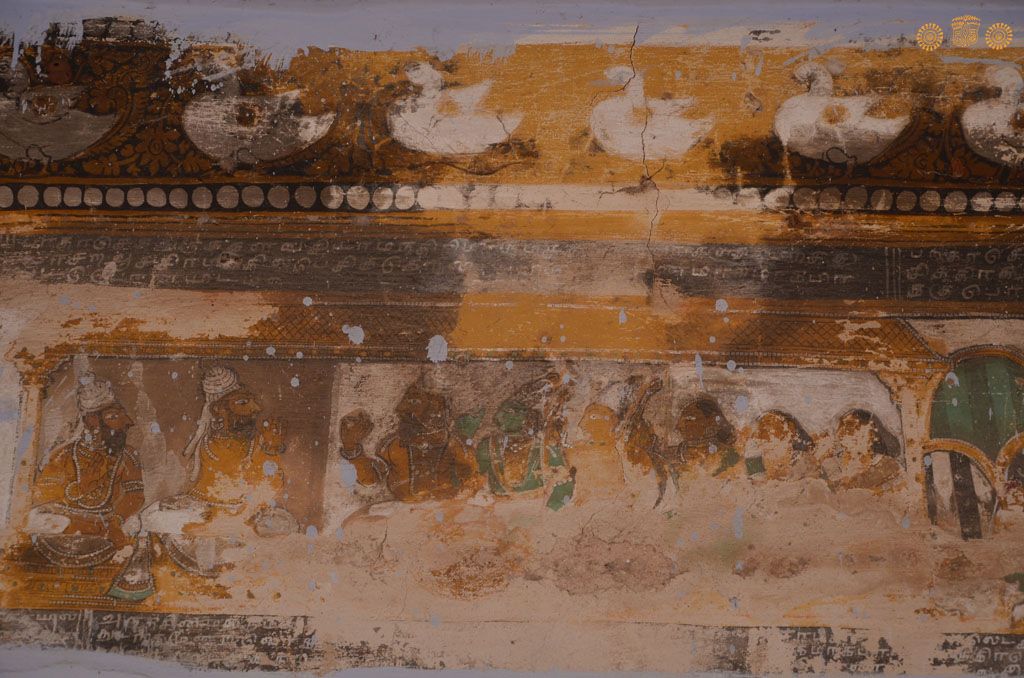
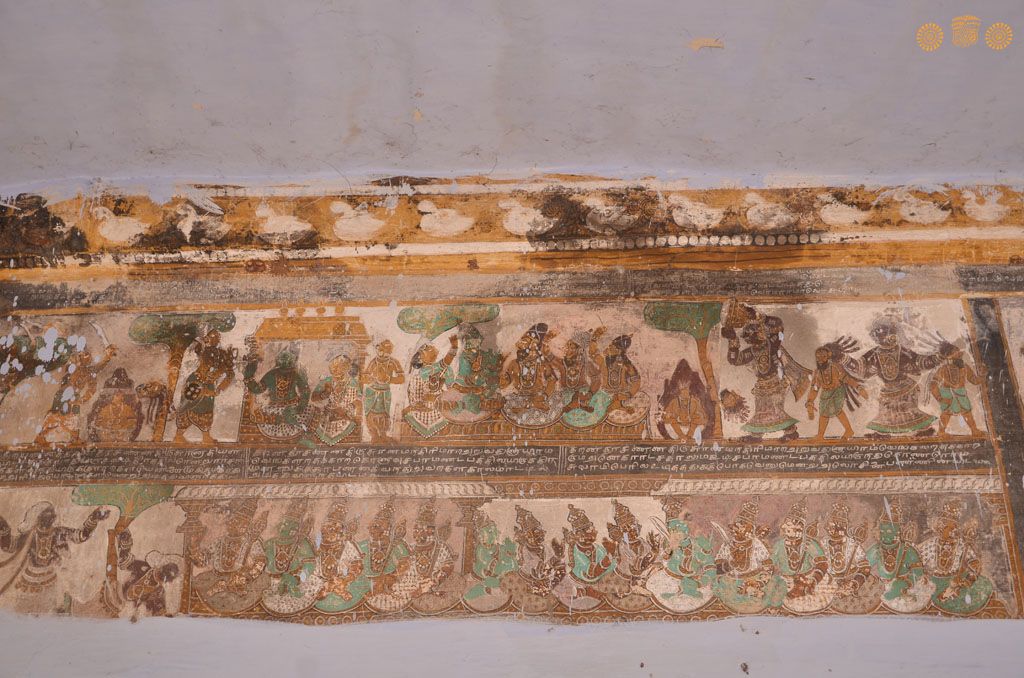
Description: A conversation between Bharata, Shatrughna and the queens, Kausalya and Sumitra; The two princes pay homage to Vasishtha, who gives them words of advice.
Location: Tamil NaduTemple;Kallalagar Temple complex;Alagar Koyil
Positioning: Vasanta mandapa, west wall
Date: 18th century, partly obliterated and damaged by splashes of whitewash
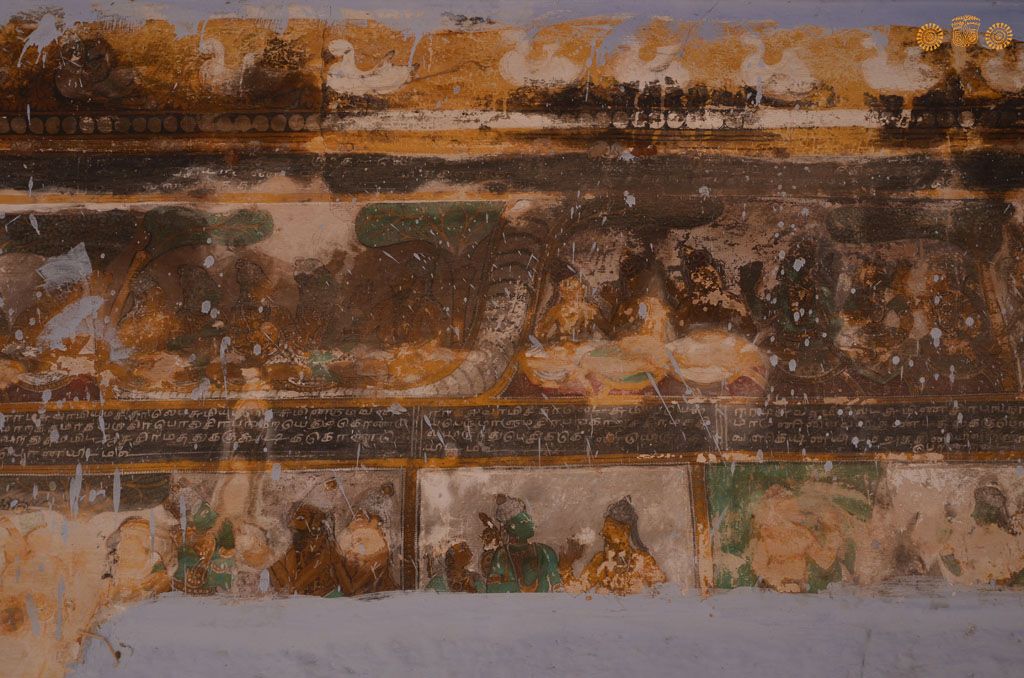
Description: On their way to Mount Chitrakuta, Vasishtha, Bharata, Shatrughna and the three queens visit Bharadvaja’s hermitage.
Location: Tamil Nadu Temple;Kallalagar Temple complex;Alagar Koyil
Positioning: Vasanta mandapa, west wall

Date: 18th century
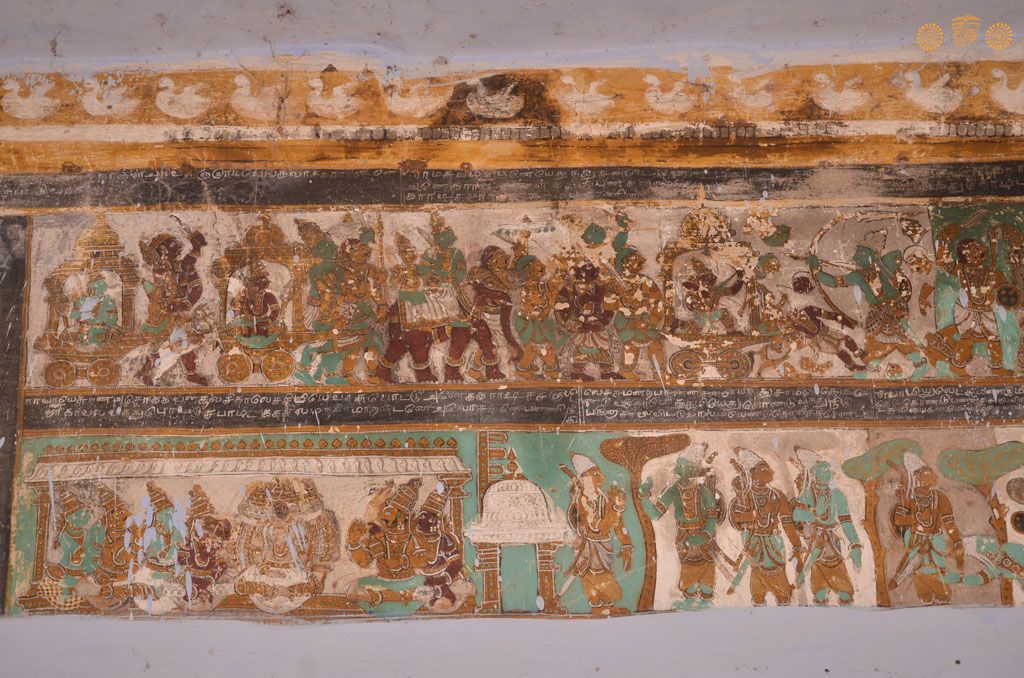
Description: The royal party alight from their chariots and walk towards Mount Chitrakuta.
Location: Tamil Nadu Temple;Kallalagar Temple complex;Alagar Koyil
Positioning: Vasanta mandapa, west wall

Date: 18th century, partly obliterated and damaged by splashes of whitewash
Description: Top row: Lakshmana perched on top of a tree sees the royal party approaching Mount Chitrakuta and alerts Rama and Sita; The exiles converse with a group of sages; Bottom row: While walking between Rama and Lakshmana Sita is abducted by the rakshasa Viradha; Rama shoots and arrow which severs his head and frees Sita. Note Viradha’s arms falling to the ground.
Location: Tamil Nadu Temple;Kallalagar Temple complex;Alagar Koyil
Positioning: Vasanta mandapa. west wall
Date: 18th century, partly obliterated and damaged by splashes of whitewash
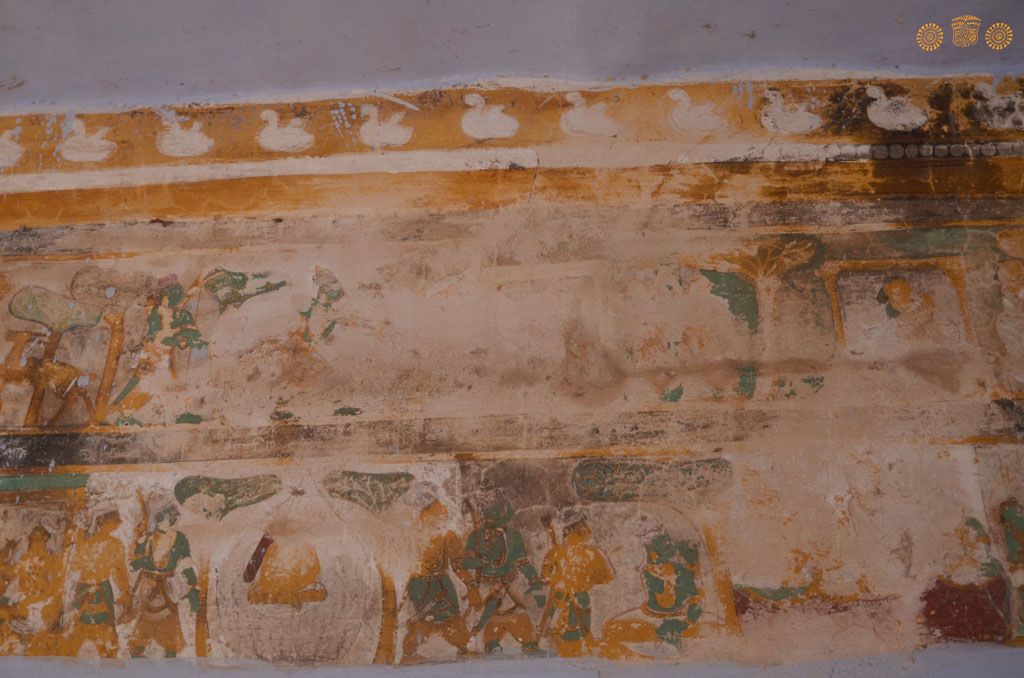
Description: Top row: The sage Bharadvaja (?) and the four princes perform the shraddha rituals for king Dasharatha; (On the right): Rama -Sita and Lakshmana seated behind him- talks to Bharata, Shatrughna and a third person. Bottom row: Fragments depicting the wanderings of the exiles in the forest and their meetings with various ascetics.
Location: Tamil Nadu Temple;Kallalagar Temple complex;Alagar Koyil
Positioning: Vasanta mandapa; west wall
Date: 18th century, partly obliterated and damaged by splashes of whitewash
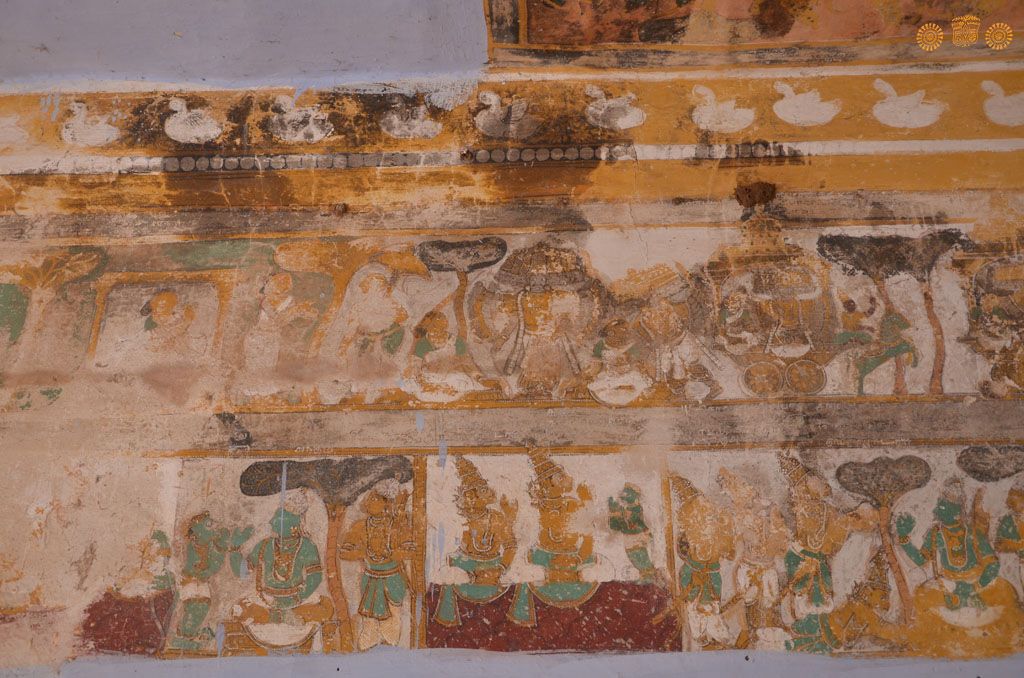
Description: Top row: Rama talks with one of his brothers (?); Rama and Sita sit on Mount Chitrakuta while Lakshmana stands in attendance; On the right: Bharata receives Rama’s sandals which are transported to Ayodhya on the back of an elephant.
Bottom row: Fragments showing the wanderings of the exiles through the forest and their meetings with ascetics.
Location: Tamil Nadu Temple;Kallalagar Temple complex;Alagar Koyil
Positioning: Vasanta mandapa; west wall
Date: 18th century, partly obliterated and damaged by splashes of whitewash
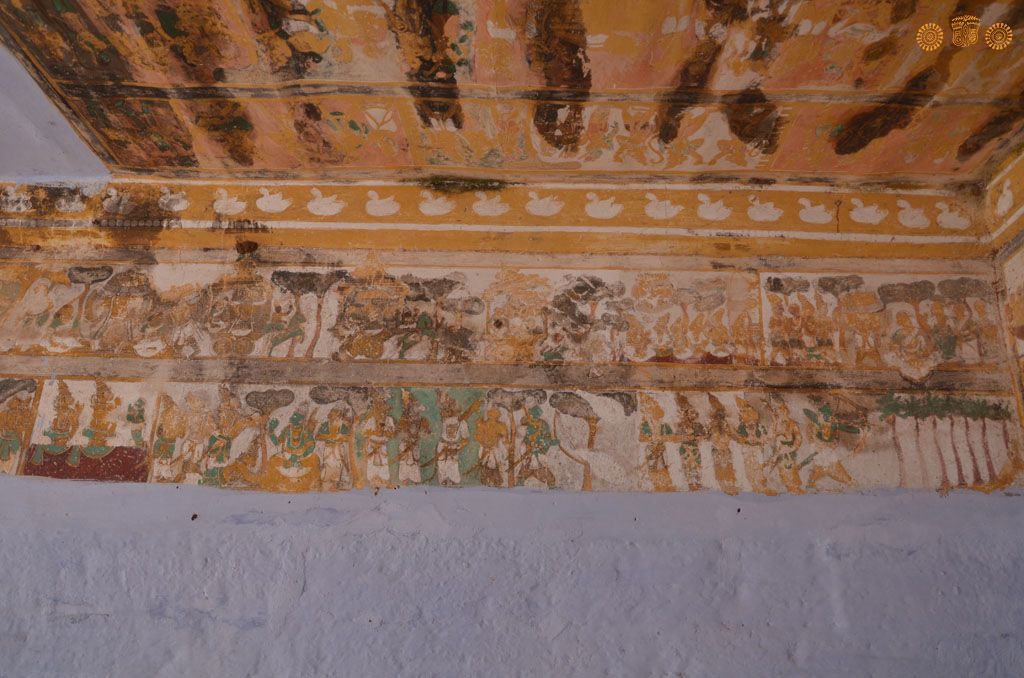
Description: Top row: Rama and Sita in the hut with Lakshmana in attendance outside it; Rama converses with two sages while Lakshmana goes int the forest and inadvertently decapitates Jambukumara, Shurpanakha’s son, who was meditating concealed in an anthill. Bottom row: A portion of this scene has been obliterated by whitewash; Shurpanakha arrives at Rama’s hut; she then is shown running away maimed (?).
Location: Tamil Nadu Temple;Kallalagar Temple complex;Alagar Koyil
Positioning: Vasanta mandapa, north wall
Date: 18th century, partly obliterated and damaged by splashes of whitewash
Description: Top row (left): Having killed Jambukumara, Lakshmana reports the incident to Rama; Rama discusses the matter with the sages; (right) In the meantime, Shurpanakha, discovers the decapitated body of her son and vents her anger on two ascetics (?); Bottom row: After having been mutilated by Lakshmana (the scene of the actual mutilation is not shown) Shurpanakha seeks her brothers’ help; They convene a meeting with their allies and plan to take their revenge.
Location: Tamil Nadu Temple;Kallalagar temple complex;Alagar Koyil
Positioning: Vasanta mandapa, north wall
Date: 18th century, partly obliterated by whitewash
Description: Top row: Shurpanakha’s three brothers on their chariots and their troops march against Rama who, single-handed, fights against them; Bottom row; Ravana, in Lanka, has a meeting with his ministers and his brother Vibhishana. In the meantime, Lakshmana joins Rama in the forest and together they walk back to the hut where they left Sita.
Location: Tamil Nadu Temple;Kallalagar Temple complex;Alagar Koyil
Positioning: Vasanta mandapa, north wall
Date: 18th century
Description: Top row: Before fighting against Shurpanakha’s brothers, Rama -seen here in the hut with Sita-requests Lakshmana, to conceal her in a mountain cave (extreme right). He then proceeds to the battlefield and routs the rakshasas. Bottom row: In finding the hut empty and Sita disappeared, Rama collapses into Lakshmana’s arms.
Location: Tamil Nadu Temple;Kallalagar Temple complex;Alagar Koyil
Positioning: Vasanta mandapa, north wall

Date: 18th century, partly obliterated by whitewash
Description: Top row: Sita, concealed in a cave is guarded by Lakshmana; Once the rakshasas are defeated the life of the three exiles goes back to normal; Lakshmana accompanies Sita back to Rama and resumes his guard duty outside their hut; (on the left) In Lanka Shurpanakha approaches her brother Ravana. Bottom row: On their search for Sita, Rama and Lakshmana meet the dying vulture Jatayu; The remains of Ravana’s charioteer are strewn around him. Jatayu dies and the brothers perform the final rites. Resuming their search they meet the rakshasi Ayomukhi who falls in love with Lakshmana. Annoyed by her advances, he cuts her ears and nose.
Location: Tamil Nadu Temple;Kallalagar Temple complex;Alagar Koyil
Positioning: Vasanta mandapa, north wall

Date: 18th century, partly obliterated and damaged by splashes of whitewash
Description: Top row: Ravana summons the rakshasa Maricha, who assumes the form of a golden gazelle and roams near Sita’s hut; She asks Rama to capture it; Rama chases the animal who disappeares deep into the forest. Bottom row: Rama and Lakshmana kill the headless rakshasa Kabandha; They arrive at the hermitage of the sage Matanga and then they resume their search for Sita.
Location: Tamil Nadu Temple;Kallalagar Temple complex;Alagar Koyil
Positioning: Vasanta mandapa, north wall
Date: 18th century
Description: Top row: Rama walks through the forest chasing the gazelle; On the right: Sita alone in the hut; Bottom row: After having visited the sage Matanga, Rama and Lakshmana meet the saintly Sabari, who, after having met them, puts an end to her life by jumping into the fire; The brothers resume their journey. The rest of the panel has disappeared.
Location: Tamil Nadu Temple;Kallalagar Temple complex;Alagar Koyil
Positioning: Vasanta mandapa, north wall
Date: 18th century
Description: Top row: While Sita is alone in the hut a mendicant appears at the door; She goes out to give him some food and he reveals himself as Ravana; She sits on the ground and Ravana uproots her, as it were, and abducts her in his aerial chariot. Bottom row: Hanuman meets the princes as soon as they arrive in Kishkindha; He then reports to two crowned monkeys; A delegation of monkeys meet Rama and Lakshmana.
Location: Tamil Nadu Temples;Kallalagar Temple complex;Alagar Koyil
Positioning: Vasanta mandapa, north wall
Date: 18th century, partly obliterated by whitewash
Description: Top row: Ravana abducts Sita in his aerial chariot; the vulture Jatayu tries to intercept the progress of the conveyance and engages in a fierce battle during which he is severely wounded and falls to earth; Ravana’s chariot resumes its flight. Sita drops her jewels tied in a piece of her garment; The monkeys find them; On arrival in Lanka she is held captive in Ravana’s ashoka grove; He tries to persuade her to marry him. Bottom row: Hanuman reports to two crowned monkeys; A delegation comes to meet the visitors; Sugriva prostrates at Rama’s feet; He then points to Rama Dundubhi’s huge carcass hanging on a tree and Rama throws it away; Then Rama pierces the seven trees with a single arrow.
Location: Tamil Nadu Temple;Kallalagar Temple complex;Alagar Koyil
Positioning: Vasanta mandapa, north wall
Date: 18th century
Description: Top row: Ravana abducts Sita in his aerial chariot; the vulture Jatayu tries to intercept the progress of the conveyance and engages in a fierce battle during which he is severely wounded and falls to earth;
Bottom row: Sugriva prostrates at Rama’s feet; He then points to Rama Dundubhi’s huge carcass hanging on a tree and Rama throws it away; Then Rama pierces the seven trees with a single arrow.
Location: Tamil Nadu Temple;Kallalagar temple complex;Alagar Koyil
Positioning: Vasanta mandapa, north wall, east corner
Date: 18th century
Description: Top row 1 (from left): In Kishkindha, Rama, Lakshmana and Hanuman confer with Sugriva; Sugriva challenges Vali; Sugriva seeks Rama’s advice; Lakshmana and Hanuman are shown behind Rama. Bottom register 2 ctd. (from left): Vali’s cremation; Sugriva and the other monkeys pay homage to Rama and Lakshmana; Sugriva’s consecration; Tara sits at his side.
Location: Tamil Nadu Temple;Kallalagar Temple complex;Alagar Koyil
Positioning: Vasanta mandapa; east corridor, ceiling, north east corner
Date: 18th century
Description: Top row 1, ctd. (from left): Rama garlands Sugriva; Tara, Vali’s wife, tries to dissuade him from fighting against Sugriva; Sugriva challenges Vali; The two engage in a duel and, concealed behind a tree, Rama aims an arrow at Vali; Bottom row 2 ctd. (from right): Rama, Lakshmana and Sugriva gather around the dying Vali, who is comforted by Tara and his son Angada; Rama extracts the arrow from Vali’s chest and the latter dies; Rama and Lakshmana confer with Angada (?); Vali’s cremation.
Location: Tamil Nadu Temple;Kallalagar Temple complex;Alagar Koyil
Positioning: Vasanta mandapa, east corridor, ceiling, northeast corner
« Previous 1 2 3 4 5 Next »